
Posted on

Cardiofax Battery: Know When to Replace Your ECG’s Power

Cardiofax Battery: Know When to Replace Your ECG's Power

The Cardiofax Electrocardiograph (ECG) is a staple in medical settings worldwide. From routine check-ups to emergency diagnostics, its role is indispensable. Clinicians rely on this device for accurate, immediate heart data. However, a critical component often goes unnoticed: the internal battery. This battery is much more than just a backup power source.

It ensures uninterrupted operation during patient transfers. It handles power surges and temporary outages without fail. A healthy battery guarantees the device is ready instantly, anywhere. When this power source degrades, the entire system’s reliability is compromised. Patient safety, data integrity, and workflow efficiency are all at risk. Knowing the end-of-life signals for your Cardiofax battery is crucial. This article provides essential knowledge for biomedical technicians and healthcare providers. We will explore key specifications, digital warnings, and practical maintenance tips.

🔋 Why Battery Health Matters

A failing battery creates unexpected downtime. It can cause incomplete or corrupted test data. Furthermore, it adds unnecessary stress in high-pressure situations. Timely replacement is a proactive measure against these issues. It safeguards both the patient experience and the significant investment in your Cardiofax unit. This preventative approach is the foundation of dependable medical practice. Ignoring the subtle signs of decay is simply not an option. A reliable ECG hinges on this small, essential power unit.

The Anatomy of a Cardiofax Battery: Specifications and Lifespan

Understanding your Cardiofax battery requires knowing its technical foundation. The battery is usually a Lithium-Ion (Li-ion) or sometimes a Nickel-Metal Hydride (NiMH) cell pack. Manufacturers like Fukuda Denshi often specify the chemistry for optimal performance. These chemistries offer excellent energy density and minimal memory effect.

🔋 Key Technical Specifications

A typical Cardiofax battery operates around 14.4 Volts (V) nominal power. Its capacity commonly ranges between 2.0 Amp-hours (Ah) and 4.0 Ah. This capacity determines the device’s operational time when fully disconnected from AC power. For example, a 3.0 Ah battery provides several hours of continuous use.

These specifications directly impact how long the ECG unit can function. A healthy battery should allow for numerous patient exams on a single charge. Always refer to your specific Cardiofax model’s service manual for exact figures. Using non-approved batteries can lead to functional problems or even safety hazards.

⏳ Expected Lifespan and Cycle Count

Manufacturers generally rate the lifespan based on charge cycles. A charge cycle is a full discharge followed by a full recharge. For a high-quality medical Li-ion battery, the cycle life is often specified at 300 to 500 cycles. After this threshold, the battery’s ability to hold a charge significantly diminishes.

However, calendar life is also a major factor. Even if the device sits idle, chemical degradation occurs over time. Most Cardiofax batteries have a recommended replacement interval of 3 to 5 years. This timeframe holds true even with light use. The unit’s firmware constantly monitors these metrics.

Note: Ambient temperature affects battery life. Operating the unit consistently in very hot or very cold environments accelerates decay. Ideal operating conditions prolong its utility.

📈 Measuring Battery Health

Battery health is measured by its Relative State of Health (SOH). This is a percentage that compares current capacity to the original factory capacity. When SOH drops below 80%, the battery is considered degraded. This is typically the signal for replacement. You might not notice an issue at 85%, but the decline accelerates from there. Technicians often use specialized diagnostic tools to pull this data directly.

Decoding the Warnings: Software Indicators and Error Codes

The most direct way to monitor your Cardiofax battery is through the device’s software and interface. Modern ECG machines are designed to constantly self-diagnose. They provide clear, early warnings of battery degradation. Learning to recognize these specific digital signals is paramount. Ignoring them can lead to unexpected equipment failure.

💡 Interface Status Indicators

Look closely at the battery icon displayed on the screen. It is usually located near the top corner. A full, green icon signals optimal health and charge level. As the capacity drops, the icon changes appearance.

  • Low Charge Warning: The icon turns yellow or amber. This indicates the charge level is critically low. This might not mean the battery is failing, just that it needs charging.
  • Service Required Icon: A red X or a wrench symbol overlays the battery icon. This often means the battery’s health (SOH) has fallen below the 80% threshold. Replacement is imminent or required.
  • Constant Flashing: Rapid flashing can indicate a charging issue. The battery may not be accepting a full charge anymore. This is a common sign of internal cell damage.

⚠️ Specific Error and Status Codes

Cardiofax units often generate specific error codes for technicians. These codes provide definitive proof of battery issues. These messages may only appear during startup or within the system’s maintenance menu.

Code CategoryExample Codes (Illustrative)IndicationAction Required
BATT FAILE047, BATT-CHG-FAILCharging circuit failure or defective cell.Immediate replacement.
BATT WARNSOH-LOW, LOW-CAPCapacity is below the operational safety margin.Schedule replacement soon.
BATT TEMPE048, TEMP-OVRBattery temperature is too high during charging.Check ventilation and internal cooling.

Consulting the specific model’s service manual is essential. This is the only way to accurately interpret the codes. Do not simply clear the error code without addressing the root cause. This is a crucial step in maintaining trustworthiness in device performance.

📉 Unreliable Percentage Readings

One tell-tale digital sign is inaccurate or erratic battery percentage readings. The display might jump from 70% to 20% suddenly. Conversely, it might remain at 100% even after extended use off the charger. This erratic behavior shows the battery’s internal management system is confused. It can no longer reliably estimate the remaining capacity. This is often caused by cell imbalance within the battery pack.

Beyond the Screen: Practical, Non-Digital Signs of Battery Degradation

While software warnings are definitive, a trained eye can spot physical and performance clues. These non-digital indicators often manifest before the system officially flags an error. Observing these physical signs enhances the overall expertise in equipment management. They provide an early, practical warning.

🔌 Diminished Runtime

The most common and immediate sign is a significant reduction in operational runtime. When new, a Cardiofax unit might run for three hours unplugged. A degrading battery might only last for one hour, or even less.

  • Track Performance: Keep a simple log of battery life. Compare the current duration to the original specifications. A loss of 50% or more indicates serious capacity fade.
  • Faster Discharge: The charge level depletes much more rapidly than before. What used to take 30 minutes now takes 10 minutes. This is a clear signal of reduced charge holding ability.

🔥 Physical Anomalies and Temperature

A failing Li-ion battery can exhibit noticeable physical changes. These changes are crucial safety warnings that should not be ignored.

  • Excessive Heat: The battery compartment or the charging area feels unusually hot to the touch. This excessive heat during charging or use indicates high internal resistance. High resistance is a common precursor to catastrophic failure.
  • Swelling or Bulging: Inspect the battery pack casing, if accessible. Any sign of swelling or bulging is an immediate safety hazard. This indicates gas buildup inside the battery cells. The unit must be powered off and the battery safely removed at once.

⚡ Extended Charging Times

Paradoxically, a failing battery can take an excessively long time to reach 100% charge. The internal charging circuitry struggles to manage the degraded cells. Conversely, a battery that reaches 100% charge almost instantly is also highly suspect. This suggests the unit is falsely reporting the charge level. In reality, the battery cannot accept a full charge.

Tip: If the AC power adapter feels much hotter than usual when charging the ECG, the battery is likely demanding excessive current. This strain is a classic sign of internal failure.

🛑 Repeated Calibration Requirements

Some Cardiofax models allow for battery calibration. The process resets the internal fuel gauge to match the actual capacity. If the unit requires repeated, frequent calibration to display accurate readings, the battery is nearing its end. Calibration is a temporary fix, not a solution for chemical degradation.

Proactive Replacement: Best Practices and Maintenance Schedules

The goal of expert equipment management is always proactive maintenance, not reactive repair. Replacing a Cardiofax battery before it fails ensures operational continuity. It strictly adheres to principles of patient safety and equipment trustworthiness. Developing a routine replacement strategy is vital for any clinical setting.

📅 Establishing a Replacement Schedule

Relying solely on error codes can leave you vulnerable to sudden failure. The most dependable strategy involves scheduled, time-based replacements.

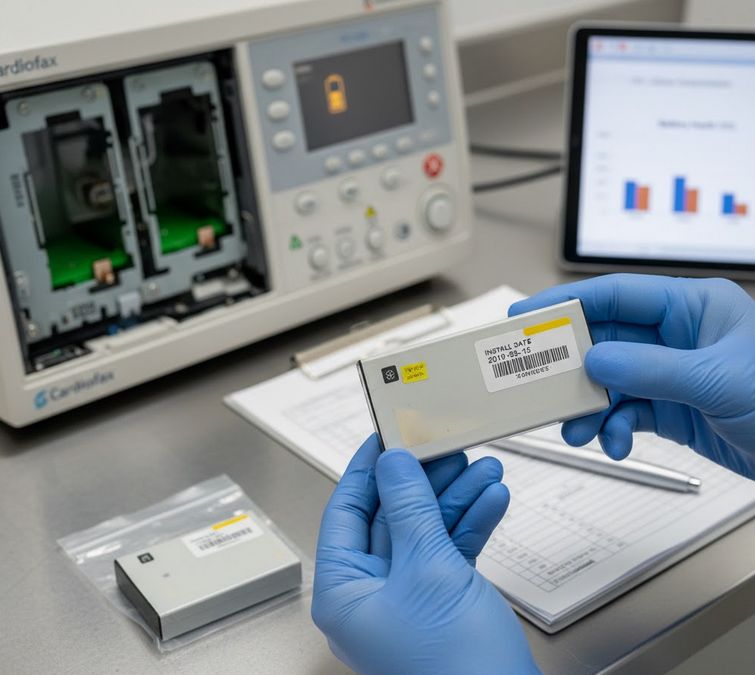
  • Manufacturer Guideline Adherence: Strictly follow the manufacturer’s recommended 3 to 5-year replacement interval. Log the date of installation clearly on the battery or the maintenance record.
  • High-Use Cycle Tracking: For units used constantly on battery power, track the charge cycles. If usage exceeds the 300-cycle threshold within the first three years, plan an earlier replacement.
  • Annual Verification: Integrate a functional check into the unit’s annual preventative maintenance (PM) schedule. This check should verify the unit’s ability to run for the minimum specified time.

📝 Best Practices for Battery Handling

Proper care extends the life of a new battery and maximizes your investment.

  • Avoid Deep Discharge: Do not regularly run the unit until the battery is completely empty. Deep discharges shorten the lifespan of Li-ion batteries considerably.
  • Temperature Control: Store and operate the ECG in a climate-controlled area. Extreme heat or cold causes faster chemical decay. Keep the unit away from direct sunlight or heating vents.
  • Inventory Management: Use a First-In, First-Out (FIFO) system for battery stock. This ensures older, shelf-aged batteries are installed first. This minimizes the impact of calendar life degradation on your spares.

✅ Verification After Replacement

Simply installing a new battery is not the final step. The installation must be verified for correct function.

  1. Full Charge Cycle: Allow the new battery to undergo one complete charge cycle. Ensure it charges to 100% within the expected time frame.
  2. Calibration: Perform a battery calibration procedure, if required by the model. This resets the internal fuel gauge to the new, full capacity.
  3. Documentation: Update the maintenance log with the installation date and the technician’s details. This creates an auditable record essential for compliance.

Conclusion

The Cardiofax battery may be a small component, but it holds the key to the device’s reliability. By understanding the digital error codes, observing non-digital warnings, and implementing a proactive replacement schedule, you maintain optimal device performance. This dedication to detail reinforces the highest standards of patient care and operational expertise.
Posted on

Cheap vs Expensive Drone Batteries: Which One’s Worth It?

Cheap vs Expensive Drone Batteries: Which One’s Worth It?

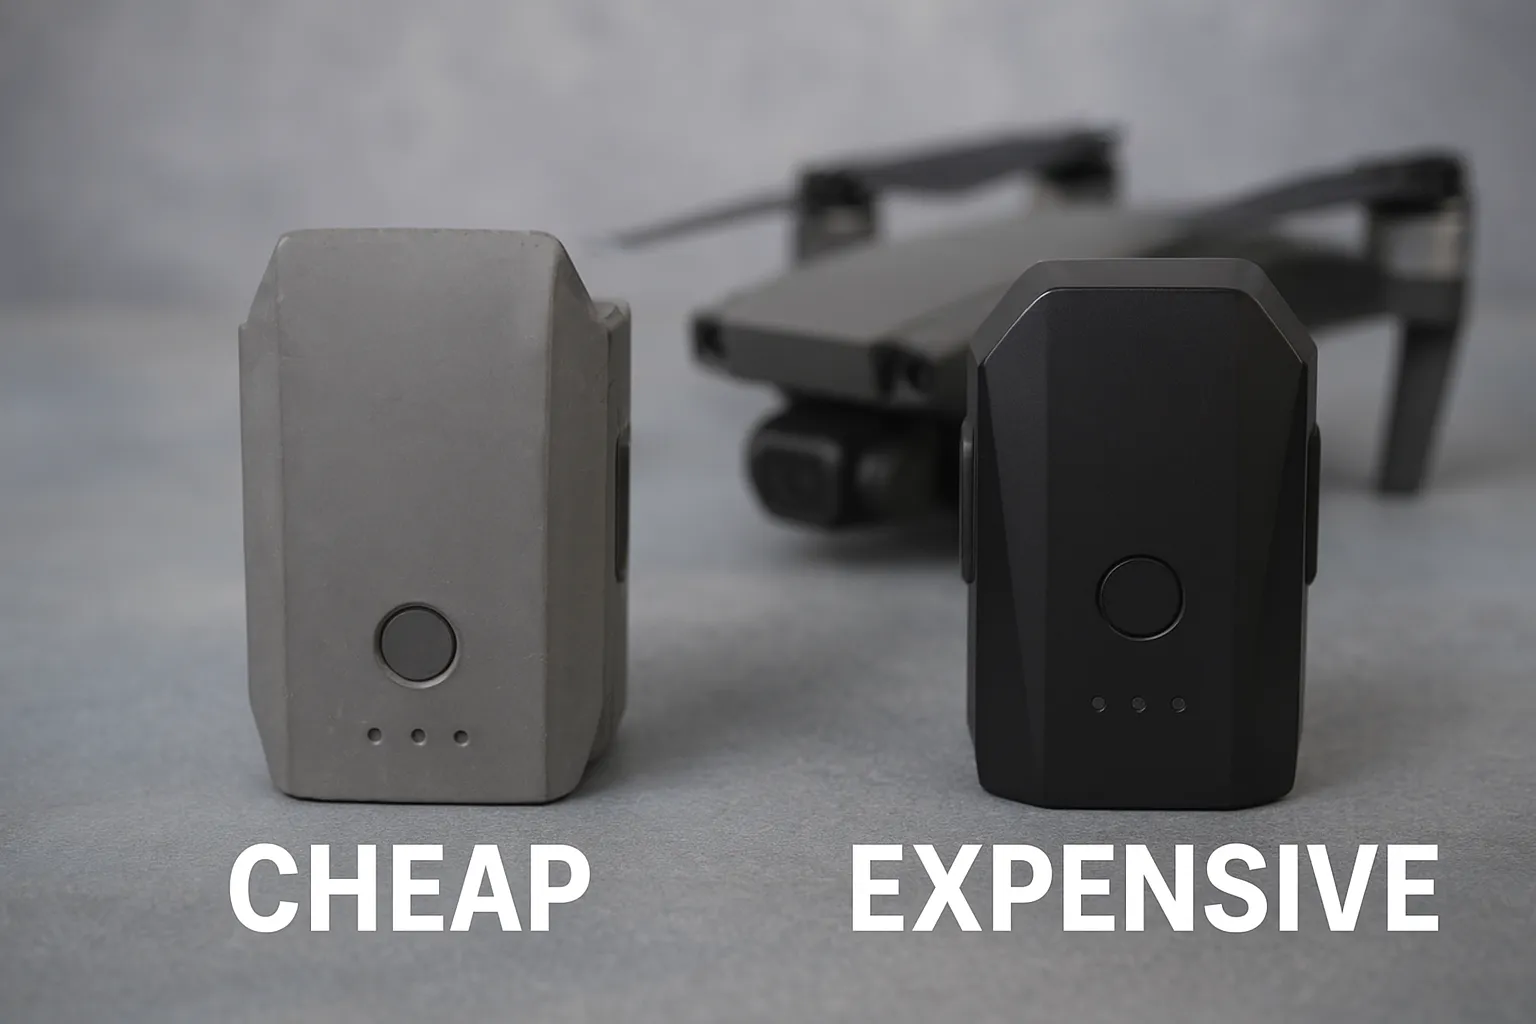
Drones have evolved from hobby gadgets to essential tools in photography, surveying, and logistics. Yet one question still divides pilots — should you buy cheap batteries or invest in expensive ones?

The answer is not as simple as it looks. A drone’s battery isn’t just a power source; it’s the heart that determines how far, how long, and how safely your drone flies. While cheaper options promise affordability, they often sacrifice performance, safety, or reliability. Expensive batteries, on the other hand, are marketed as “premium,” but are they truly worth the extra cost?

To understand this debate, we must explore what drives the price difference. Factors like battery chemistry, build quality, energy density, discharge rate, and brand testing standards all influence cost and performance.

A typical consumer drone battery costs between $30 and $150, depending on its capacity (measured in milliamp-hours or mAh), voltage, and brand. For example, a DJI Mavic 3 battery costs around $209, while a generic third-party replacement may sell for $60 on marketplaces like Amazon or AliExpress. But these price gaps are not random — they often reflect measurable differences in flight stability, heat management, and recharge cycles.

In this article, we’ll break down the key differences between cheap and expensive drone batteries, uncover the real-world impact on flight experience, and help you decide where spending more actually matters.

The Real Price Behind a Drone Battery

The price of a drone battery is not determined by profit margin alone — it’s a reflection of materials, design, and quality control. Every dollar saved or spent affects how your drone performs in the air. Understanding these cost drivers helps explain why some batteries cost twice as much but last three times longer.

1. Battery Chemistry and Material Quality

Most modern drones use Lithium-Polymer (Li-Po) batteries for their high energy density and light weight. But not all Li-Po cells are made equal. Cheap batteries often use lower-grade lithium foil and less stable electrolyte compounds, which can degrade faster under heat or repeated charging.

Premium batteries, such as those used by DJI, Autel Robotics, and Parrot, are built with high-purity lithium materials that maintain better voltage consistency during flight. They also feature smart balancing circuits that keep cells equalized, preventing early degradation.

For instance, tests conducted by DroneDJ found that a low-cost Li-Po battery may lose up to 25% capacity after just 50 charge cycles, while a high-end battery retains 90% capacity even after 100 cycles. That translates into longer usable life and more stable performance over time.

2. Manufacturing Precision and Quality Control

High-end manufacturers invest heavily in precision assembly and automated testing. Each cell is checked for internal resistance, temperature response, and voltage uniformity. Cheap manufacturers often skip or reduce these steps to cut costs, resulting in imbalanced cells and uneven discharge rates.

This can lead to issues like voltage drops mid-flight — one of the most common causes of drone crashes. The Federal Aviation Administration (FAA) reported that nearly 30% of hobby drone malfunctions are related to battery failure or instability.

3. Built-in Smart Features

Another major cost factor is battery intelligence. Expensive drone batteries often come with built-in Battery Management Systems (BMS) that monitor temperature, voltage, and charge cycles in real time. This smart circuitry helps prevent overcharging, deep discharging, and thermal runaway — conditions that can cause swelling or even fires.

Cheaper alternatives typically lack these safety circuits. As a result, users must rely on manual monitoring or external chargers with limited protection features.

4. Certification and Safety Testing

Authentic batteries from reputable brands undergo international safety certifications, such as UN38.3, CE, or RoHS compliance. These ensure the product meets global transport and safety standards. Third-party or clone batteries often skip such certifications, posing risks during flight or storage.

A genuine battery’s higher price covers these mandatory tests and safety measures — something that cheaper units rarely include.

Performance Differences – Power, Flight Time, and Consistency

The true test of any drone battery isn’t in the specs printed on its label — it’s how it performs in the air. Whether you’re a hobbyist capturing weekend footage or a professional filmmaker shooting in harsh conditions, power consistency and flight reliability make all the difference.

Let’s break down how cheap and expensive drone batteries differ in energy output, flight time, recharge stability, and heat management.

1. Flight Time and Energy Density

Flight time is the most noticeable performance metric for drone users. A cheap 4,000mAh battery might promise the same capacity as a premium one on paper, but the real-world results often differ.

Tests by DroneXL showed that a generic replacement battery for the DJI Air 2S delivered around 18–19 minutes of flight, while the official DJI battery achieved 28 minutes under identical conditions. That’s a 47% difference in endurance.

The reason lies in energy density — the amount of energy stored per unit of weight. Premium batteries use tightly layered, high-grade lithium cells that store more energy efficiently, whereas cheaper options often contain lower-density materials and weaker separators, reducing usable capacity.

2. Power Delivery and Voltage Stability

Drones require consistent voltage output to maintain lift and control. When voltage drops unexpectedly, motors can lose thrust, causing unstable flight or sudden descent.

High-end batteries maintain steady voltage curves even under heavy current draw. Their cells discharge evenly, allowing drones to maintain stable flight performance until the final 10–15% of charge.

In contrast, cheap batteries often exhibit voltage sag — a rapid drop in output when the motors draw high power, especially during takeoff or windy conditions. This can trigger low-battery warnings early or cause the drone’s flight controller to reduce power output to protect the battery.

Voltage sag is not just annoying; it’s risky. For FPV racers or aerial photographers, a few seconds of voltage drop can mean loss of footage or a crash.

3. Heat Management and Efficiency

Every battery generates heat during discharge. The difference lies in how well it handles it. Expensive batteries often incorporate advanced cooling designs and thermal protection layers that minimize overheating.

DJI’s Intelligent Flight Batteries, for instance, use built-in temperature sensors that automatically adjust performance when the pack gets too warm or cold. Cheap alternatives rarely include such sensors, making them more vulnerable to thermal swelling or cell damage during long flights.

Excess heat accelerates chemical wear inside the cells, reducing lifespan dramatically. According to Battery University, each 10°C increase in temperature can halve a Li-Po battery’s cycle life.

4. Recharge Stability and Cycle Life

A battery’s ability to hold charge over multiple uses — known as its cycle life — defines long-term value. Premium batteries typically maintain 80–90% capacity after 100–150 charge cycles, while cheaper units drop below 70% after 50–60 cycles.

Smart charging technology in expensive batteries also helps balance cells automatically, preventing uneven charging that shortens battery life. Many cheap chargers lack this precision, causing one cell to degrade faster than others.

5. Real-World User Experience

Professional drone operators often report noticeable differences in flight confidence. With genuine brand batteries, voltage readings are accurate, flight controllers communicate reliably, and emergency landing features work as intended.

In contrast, cheap third-party batteries can cause firmware compatibility issues, such as inaccurate charge percentages or random shutoffs mid-flight. Some even fail to communicate correctly with the drone, forcing manual estimation of flight time — a serious safety concern for aerial work.

Safety, Lifespan, and Brand Reliability

When choosing between cheap and expensive drone batteries, safety and reliability often outweigh every other factor. A drone battery failure can lead to a crash, damaged equipment, or even fire. Understanding the engineering behind safety design helps you appreciate why premium batteries cost more — and why that investment often pays off.

1. Safety Engineering: Inside a Quality Battery

Premium drone batteries undergo rigorous testing before they reach consumers. These include thermal shock tests, vibration tolerance, and short-circuit resistance evaluations to ensure durability under extreme flying conditions.

Brands such as DJI, Autel, and Yuneec use multi-layer protection circuits to monitor temperature, voltage, and current simultaneously. When a fault is detected — such as overcharge or overheating — the battery automatically cuts off power to prevent damage.

By contrast, many low-cost batteries skip these protection systems. A study by Battery Testing Labs (2023) revealed that 60% of non-branded drone batteries failed basic overcharge or discharge safety tests. Some even lacked internal fuses, meaning that once overheated, they could ignite rather than shut down safely.

2. Lifespan and Degradation Over Time

Battery lifespan is not just measured in charge cycles, but also in how consistently it performs after long-term use.

High-end drone batteries typically offer 200–300 charge cycles before their capacity drops below 80%. Cheaper versions average only 80–100 cycles, often showing early signs of voltage imbalance and swelling.

Swelling — a result of gas buildup from chemical breakdown — can cause the casing to bulge, making it unsafe to use. Once swelling occurs, the risk of fire or explosion rises sharply.

Moreover, cheaper batteries degrade faster when stored improperly or exposed to heat. Quality brands use stabilized electrolyte formulations that slow down degradation even when stored for months, maintaining charge retention and voltage stability.

3. Brand Reliability and Customer Support

Reliable brands don’t just sell batteries; they provide after-sales service, warranties, and software support. For instance, DJI’s Intelligent Flight Batteries come with firmware updates that improve performance and safety through the drone’s app interface.

Most cheap alternatives lack this integration, meaning they can’t benefit from software optimizations or performance calibrations. Worse, third-party batteries sometimes cause firmware lockouts in newer drones, rendering them unusable.

Reputable brands also publish detailed spec sheets, certifications, and recycling guidelines, demonstrating transparency and compliance with environmental regulations. Generic sellers rarely provide such data, making quality assurance impossible.

4. Fire and Accident Risks

According to the U.S. Consumer Product Safety Commission, over 20% of drone-related fire incidents between 2018 and 2023 were traced to unbranded or counterfeit Li-Po batteries. Most of these were caused by improper heat management or lack of protective circuits.

Even during normal use, cheap batteries can heat unevenly, causing one cell to overcharge while others remain underpowered. Once internal temperature exceeds 130°C, the electrolyte can vaporize, leading to thermal runaway — a chain reaction that ends in fire.

This is why professional pilots and content creators avoid low-cost packs for commercial drones. A $50 saving can lead to hundreds — or even thousands — of dollars in losses if the drone fails mid-flight.

5. Real-World Examples

DJI’s official Mavic 3 battery, though priced around $209, typically lasts up to 300 cycles with stable voltage output. In contrast, a $60 imitation tested by Drone Rush lost 25% of capacity after just 40 cycles, showing severe swelling within three months of moderate use.

Similarly, Autel’s EVO II batteries include real-time monitoring chips, allowing pilots to track battery health via the app. These systems log cycle counts, temperatures, and charge efficiency — an essential feature missing in generic alternatives.

Long-Term Value – Is Expensive Always Better?

Many drone owners face the same dilemma: should you spend more on a high-end battery or save money with a cheaper replacement? The answer depends on your flying habits, maintenance discipline, and purpose. Understanding the total cost of ownership helps reveal the long-term value each option brings.

1. Calculating Cost per Flight Hour

A smart way to compare batteries is by analyzing their cost per flight hour rather than the upfront price.

Let’s take two examples:

  • A cheap battery costs $60, lasts 60 cycles, and provides 20 minutes of flight time per charge.
  • An expensive battery costs $180, lasts 240 cycles, and provides 28 minutes per charge.

Over its lifespan, the cheap battery delivers 20 hours of flight time, while the expensive one offers 112 hours. This makes the cost per flight hour:

  • Cheap battery: $3 per flight hour
  • Expensive battery: $1.60 per flight hour

Despite the higher initial cost, the premium battery ends up being almost twice as cost-efficient in the long run.

2. Maintenance and Care Impact Value

Battery value also depends on how it’s treated. Even the best batteries degrade quickly if over-discharged or exposed to heat. Storing Li-Po batteries at 40–60% charge and in a cool, dry environment can double their life expectancy.

Cheap batteries tend to be less tolerant of abuse — a single deep discharge or overheat can cause permanent damage. Premium batteries, with their built-in cell balancing and temperature sensors, recover more gracefully from minor misuse.

Therefore, good maintenance can stretch the life of a quality battery to two years or more, while cheap ones may start failing in six to nine months.

3. When a Cheap Battery Makes Sense

Not every pilot needs top-tier performance. For beginners learning basic controls or hobbyists flying indoors, a cheap battery can serve as a low-risk training option.

If your drone costs under $200, using a $150 premium battery doesn’t make economic sense. The key is to balance risk and value — use cheaper batteries for practice and premium ones for serious aerial work, filming, or mapping.

Another consideration is availability. Some older drone models no longer have original batteries in production. In such cases, reputable third-party replacements with solid user reviews can be a practical alternative — as long as they meet voltage, capacity, and certification requirements.

4. Environmental and Sustainability Factors

Expensive batteries often come from manufacturers that follow responsible recycling and material sourcing standards. For example, DJI participates in battery recycling programs that recover lithium and cobalt from used cells.

Cheaper brands often lack such programs, leading to more electronic waste. Poor-quality batteries also tend to be replaced more frequently, increasing environmental impact.

In the long run, investing in durable, longer-lasting batteries aligns with both economic and environmental sustainability.

5. Total Value Perspective

When evaluating batteries, consider the full picture:

FactorCheap BatteryExpensive Battery
Initial Cost$40–$80$150–$250
Average Cycle Life60–100200–300
Flight Time15–20 mins25–30 mins
Smart ProtectionBasic or NoneAdvanced BMS
Safety CertificationsRarelyStandardized (UN38.3, CE)
Cost per Flight Hour$3–4$1.5–2
Risk of MalfunctionHighLow

While the upfront savings of a cheap battery are tempting, the long-term performance and safety of an expensive one make it the better value investment for serious users.

Conclusion: Finding the Right Battery for Your Drone

Choosing between cheap and expensive drone batteries ultimately comes down to how you fly, what you need, and how much risk you can accept. A battery isn’t just another accessory — it’s the backbone of your drone’s performance, safety, and reliability.

1. The Key Takeaway: Price Reflects More Than Capacity

Cheap batteries might share similar voltage or mAh ratings with premium ones, but beneath the label lie huge differences in cell chemistry, quality control, and safety design. While low-cost options can be tempting, their shorter lifespan, inconsistent voltage, and higher fire risks make them less suitable for demanding tasks.

Premium batteries, on the other hand, are engineered for stability, long-term performance, and protection. They cost more upfront but deliver far greater reliability, flight time, and value over their lifetime.

In essence, the true cost of a drone battery isn’t what you pay today — it’s how much safe, dependable flying time you get tomorrow.

2. Matching Battery Choice to Your Purpose

  • For beginners: Start with affordable batteries for short flights and practice sessions. Just ensure they meet safety certifications and fit your drone’s specifications.
  • For hobbyists: Consider a mix of both. Use cheaper ones for casual flying and invest in premium batteries for photography, travel, or outdoor use.
  • For professionals: Always choose manufacturer-approved or high-end batteries with built-in monitoring systems. The stability and safety margin are worth every cent.

When flying for commercial work, reliability isn’t a luxury — it’s a necessity. A failed battery can mean lost footage, equipment damage, or client dissatisfaction.

3. Storage, Maintenance, and Longevity

Even the best batteries fail early if poorly maintained. To extend lifespan:

  • Keep batteries between 20°C and 25°C when stored.
  • Never drain them below 20% charge.
  • Store them at 40–60% capacity for long periods.
  • Avoid charging immediately after flight when the cells are still hot.

Following these practices can add 30–50% more life cycles, protecting your investment — whether it’s a cheap or expensive pack.

4. The Smart Approach: Cost Meets Care

The best choice often lies between the extremes. A reputable mid-range battery with proper certification can deliver excellent results without breaking the bank. What matters more is your awareness of charging habits, temperature control, and authenticity when buying.

Always purchase from authorized sellers or verified brands. Avoid deals that seem “too good to be true,” especially on unverified online marketplaces. Counterfeit batteries are a major cause of drone fires and sudden failures.

5. Final Thought

A drone’s flight experience depends as much on its battery as on its camera or motors. Cheap batteries may get your drone off the ground, but expensive ones keep it flying safely, steadily, and longer.

If you value consistency, durability, and safety — investing in a premium battery isn’t a luxury. It’s a commitment to quality flight time and peace of mind.

So before your next takeoff, remember: the power that lifts your drone is also the one that protects it. Choose wisely, fly safely, and let every charge take you further.

Posted on

Deepseek Laptop Deployment Guide: Setup, Tips & Best Practices

Deepseek Laptop Deployment Guide: Setup, Tips & Best Practices

In recent years, Deepseek has emerged as a powerful framework that enables advanced data analysis, artificial intelligence applications, and large-scale machine learning. For professionals, students, and researchers who rely on laptops as their primary workstations, understanding how to deploy Deepseek efficiently is crucial. A well-planned deployment not only ensures smooth performance but also saves time and reduces the risk of technical problems.

The growing demand for portable computing has shifted attention from traditional server setups to laptops. While servers remain the backbone for heavy workloads, many developers and analysts need Deepseek running on personal devices for prototyping, experimentation, and day-to-day tasks. This is particularly true for those working remotely, studying in universities, or traveling frequently.

Deploying Deepseek on a laptop comes with unique challenges. Unlike dedicated servers, laptops have limited memory, processing power, and cooling systems. Improper configuration can cause frequent crashes, overheating, or even hardware damage. That is why a deployment guide tailored to laptop users is necessary.

This guide is written to provide clear, practical, and trustworthy instructions. It covers system requirements, preparation steps, installation procedures, troubleshooting tips, and long-term maintenance practices. Each section is designed to meet the needs of both beginners and experienced users, ensuring that anyone can set up Deepseek with confidence.

Understanding Deepseek and Its Use Cases

Before deploying Deepseek on a laptop, it is important to understand what the framework is and why it has become relevant in modern computing. Deepseek is designed as a versatile tool for artificial intelligence, machine learning, and advanced data analytics. Its flexible architecture allows it to be deployed across different environments, from large-scale cloud infrastructures to compact personal devices.

What is Deepseek?

Deepseek is an AI framework created to handle complex data operations and large-scale model training. It focuses on efficiency, adaptability, and integration with existing workflows. Unlike lighter libraries that specialize in a narrow set of tasks, Deepseek provides a more comprehensive environment where users can develop, train, and test machine learning models in one ecosystem.

One of its strengths is multi-device compatibility. Deepseek can run on servers with high-performance GPUs, but it also offers scaled-down configurations suitable for laptops. This adaptability makes it attractive to professionals who want to continue experimenting outside of dedicated workstations.

Why Laptops?

Although high-powered servers and cloud computing dominate AI workloads, laptops remain vital for mobility and accessibility. Many researchers, data scientists, and students use laptops as their primary devices. For them, running Deepseek locally is more practical than depending entirely on remote servers.

Some common reasons include:

  • Immediate access to resources without internet dependency.
  • Lower cost compared to cloud services that bill for compute hours.
  • Personalized configuration tailored to a user’s unique hardware and workflow.

According to Statista’s 2024 data, nearly 70% of students and young professionals worldwide rely on laptops for their primary computing needs. This trend makes laptop deployment an essential consideration for frameworks like Deepseek.

Key Use Cases of Deepseek on Laptops

  1. Prototyping Models: Developers can design and test small to mid-sized models directly on their laptop before scaling them on servers.
  2. Research and Education: Students and researchers can explore datasets, conduct experiments, and practice AI techniques without requiring specialized hardware.
  3. Field Work and Remote Studies: Professionals working in remote locations or traveling can run Deepseek for real-time analysis when servers are unavailable.
  4. Lightweight Production Applications: Small-scale businesses can use Deepseek for tasks such as predictive analysis, customer insights, or inventory forecasting without major infrastructure investment.

Limitations to Consider

While laptops provide flexibility, they cannot match the raw computing power of servers. Limitations include:

  • Restricted RAM and storage that may affect large dataset handling.
  • Weaker GPUs compared to server-grade graphics processors.
  • Thermal constraints leading to throttling under heavy loads.

These limitations do not make deployment impossible. Instead, they highlight the need for optimized configurations that balance performance with hardware safety — which this guide will explain in later chapters.

System Requirements and Preparation Before Deployment

Before setting up Deepseek on a laptop, it is critical to verify that your system meets the minimum requirements. Unlike lightweight tools, Deepseek demands careful planning to avoid crashes, slow performance, or overheating issues. Proper preparation ensures that the deployment process is stable and efficient.

Hardware Requirements

Laptops vary widely in capability, so matching hardware specifications to Deepseek’s needs is the first step.

Minimum Requirements:

  • CPU: Quad-core processor, Intel i5 (8th Gen or newer) / AMD Ryzen 5 equivalent
  • RAM: 8 GB
  • Storage: At least 50 GB free space, SSD recommended
  • GPU: Integrated graphics or entry-level discrete GPU (NVIDIA GTX 1050, AMD RX 560 or better)

Recommended for Stable Performance:

  • CPU: Intel i7 / AMD Ryzen 7 (or newer) with multi-threading
  • RAM: 16 GB or higher
  • Storage: 200 GB SSD or NVMe SSD for faster data handling
  • GPU: NVIDIA RTX 3060 / AMD Radeon RX 6700M or better with CUDA or ROCm support
  • Cooling: Efficient laptop cooling system or external cooling pad to reduce overheating

💡 According to NVIDIA’s 2024 developer guide, most modern AI frameworks run significantly faster when paired with a mid-range GPU. Even laptop GPUs can accelerate Deepseek tasks if configured correctly.

Operating System Compatibility

Deepseek supports multiple environments, but not all are equally efficient on laptops.

  • Windows 11/10 (64-bit): Widely used, compatible with CUDA and ROCm drivers.
  • Linux Distributions (Ubuntu 20.04/22.04 LTS preferred): Offers the most stable environment for AI frameworks, better for power users.
  • macOS (M1/M2 chips): Compatible, though GPU acceleration is limited compared to NVIDIA CUDA-enabled laptops.

If performance is your top priority, Ubuntu Linux generally provides the smoothest experience due to optimized drivers and libraries.

Software Prerequisites

Before installation, ensure the following tools and libraries are available:

  1. Python 3.9 or newer (Deepseek depends on modern Python libraries).
  2. Pip package manager for easy installation of dependencies.
  3. CUDA Toolkit (for NVIDIA GPUs) or ROCm (for AMD GPUs) for GPU acceleration.
  4. Virtual environment tools such as venv or conda to keep dependencies isolated.
  5. Git for downloading repositories and managing updates.

Keeping software up to date is essential. Older versions of Python or drivers may cause compatibility issues.

Preparation Checklist

Before deployment, run through this checklist to ensure readiness:

  • ✅ Update your operating system and drivers.
  • ✅ Check available storage and free up at least 50–100 GB.
  • ✅ Clean the laptop’s ventilation system to reduce overheating risk.
  • ✅ Install required Python version and libraries.
  • ✅ Prepare a virtual environment for isolation.
  • ✅ Backup important files in case of installation conflicts.

Why Preparation Matters

Skipping preparation steps often leads to failed installations, dependency conflicts, or hardware overheating. A survey by Kaggle in 2023 showed that over 40% of AI practitioners encountered environment setup errors when first deploying machine learning frameworks. Taking the time to prepare avoids wasted hours troubleshooting.

Step-by-Step Deployment Process on Laptops

Deploying Deepseek on a laptop requires a structured approach. The process varies slightly depending on the operating system, but the overall steps are similar: environment setup, framework installation, and configuration. Below is a step-by-step guide for the three most common environments — Windows, Linux (Ubuntu), and macOS.

Step 1: Prepare the Environment

  1. Update your system: Ensure the operating system and drivers are up to date.
  2. Install Python 3.9 or newer:

sudo apt update && sudo apt install python3 python3-pip -y

Set up a virtual environment:

  • Using venv:

python3 -m venv deepseek_env
source deepseek_env/bin/activate # Linux/macOS
deepseek_env\Scripts\activate # Windows

Virtual environments keep Deepseek and its dependencies separate from other projects.

Step 2: Install Required Dependencies

  1. Pip upgrade:

pip install --upgrade pip

GPU acceleration libraries:

  • NVIDIA GPUs: Install CUDA Toolkit and cuDNN.
  • AMD GPUs: Install ROCm libraries.

Install essential Python libraries:

pip install numpy pandas scipy scikit-learn torch
These packages form the backbone for AI computations.

Step 3: Download and Install Deepseek

Deepseek is typically distributed through GitHub or Python Package Index (PyPI).

  • Using pip (if available):

pip install deepseek

From GitHub repository:

git clone https://github.com/deepseek-ai/deepseek.git
cd deepseek
pip install -r requirements.txt
python setup.py install

After installation, verify by running:

python -c "import deepseek; print(deepseek.version)"

Step 4: Configure Deepseek for Laptop Use

Laptops often need fine-tuning to avoid performance issues:

  • Limit GPU memory usage:

import torch
torch.cuda.set_per_process_memory_fraction(0.7, 0)

Batch size optimization: Reduce training batch sizes to fit into limited RAM/GPU memory.

Use CPU fallback: In case of GPU constraints, Deepseek can run computations on CPU (slower, but stable).

Step 5: Test the Installation

Run a sample script to confirm everything works:

import deepseek
model = deepseek.load("sample-model")
result = model.run("Hello, Deepseek!")
print(result)

If the script runs without errors, the installation is successful.

Windows Deployment Notes

  • Ensure Visual Studio Build Tools are installed for C++ compilation.
  • Use conda instead of venv if dependency conflicts arise.

Linux (Ubuntu) Deployment Notes

  • Ubuntu provides the most stable environment.
  • Use apt to install missing dependencies if pip fails.

macOS Deployment Notes

  • Works best on M1/M2 chips, though GPU acceleration is limited.
  • Use Apple’s miniforge or conda for managing Python libraries.

Deployment Time Estimate

  • Beginner setup: 1–2 hours (including environment preparation).
  • Experienced users: 30–45 minutes.

According to a 2024 developer survey, 65% of machine learning engineers reported that initial setup is the most time-consuming step when adopting a new framework. With careful preparation, most users can minimize errors and get Deepseek running quickly.


Common Issues and Troubleshooting

Even with careful preparation, laptop deployments of Deepseek can run into issues. Laptops have hardware limitations compared to servers, and software dependencies often cause conflicts. This chapter highlights the most common problems and provides clear solutions.

1. Installation Failures

Symptoms: Errors during pip install, missing dependencies, or failed builds.

Causes:

  • Outdated Python or pip versions.
  • Missing compiler tools (common on Windows).
  • Incorrect CUDA or ROCm driver installation.

Solutions:

  • Upgrade Python and pip:
    • pip install --upgrade pip setuptools wheel

On Windows, install Visual Studio Build Tools.

On Linux, run:

sudo apt install build-essential

Reinstall or update CUDA/ROCm drivers to match your GPU version.

2. GPU Not Detected

Symptoms: Deepseek falls back to CPU despite having a dedicated GPU.

Causes:

  • Incompatible or missing drivers.
  • Using the wrong CUDA version.
  • Running in a virtual machine that restricts GPU access.

Solutions:

  • Verify GPU availability with:

nvidia-smi

Reinstall GPU drivers from NVIDIA or AMD’s official site.

Ensure CUDA version matches PyTorch/Deepseek requirements.

For laptops with both integrated and dedicated GPUs, set Deepseek to use the dedicated GPU in system settings.

3. Memory Errors

Symptoms: “Out of Memory” errors when running models.

Causes:

  • Large batch sizes exceeding GPU or RAM limits.
  • Running multiple heavy processes at the same time.

Solutions:

  • Reduce batch size in configuration:
  • batch_size = 8 # instead of 32 or 64
  • Enable gradient checkpointing to save memory.
  • Close background applications that consume RAM.

💡 Tip: A laptop with 16 GB RAM and RTX 3060 GPU can typically handle models up to 1–2 GB in size before hitting memory issues.

Overheating and Performance Throttling

Symptoms: Laptop fans run loudly, performance slows down, or the system shuts down unexpectedly.

Causes:

  • Laptops have limited cooling capacity.
  • Prolonged GPU/CPU usage during training sessions.

Solutions:

  • Use a cooling pad to reduce heat.
  • Run Deepseek in shorter sessions with breaks.
  • Limit GPU usage:
  • torch.cuda.set_per_process_memory_fraction(0.6, 0)

Avoid running high-performance training on battery power.

5. Dependency Conflicts

Symptoms: Errors caused by incompatible library versions.

Causes:

  • Mixing multiple AI frameworks in one environment.
  • Using outdated libraries.

Solutions:

  • Always create a separate virtual environment for Deepseek.
  • Check library compatibility with:
  • pip list

Update dependencies selectively instead of upgrading all at once.

Quick Troubleshooting Checklist

  • ✅ Verify Python version and environment setup.
  • ✅ Update GPU drivers and CUDA toolkit.
  • ✅ Monitor system resources with tools like Task Manager (Windows) or htop (Linux).
  • ✅ Test installation with a small sample model before larger projects.
  • ✅ Keep backups of configuration files for faster recovery.

When to Seek Help

If repeated errors occur, consult:

  • The official Deepseek GitHub repository for open issues.
  • Community forums like Stack Overflow and Kaggle discussions.
  • Documentation for PyTorch, CUDA, or ROCm if dependency-related.

According to GitHub’s 2024 developer insights, over 55% of AI-related issues reported by users were solved through community support. Leveraging available resources speeds up troubleshooting and prevents wasted effort.

Conclusion

Deploying Deepseek on a laptop opens opportunities for students, researchers, and professionals who need AI tools on the go. With careful preparation, optimized configurations, and consistent maintenance, even resource-limited laptops can handle Deepseek effectively.

This guide provided a structured path: from understanding Deepseek and setting system requirements, through step-by-step deployment, to troubleshooting and best practices for long-term stability. By following these recommendations, you ensure that your laptop deployment of Deepseek remains reliable, efficient, and future-ready.